As well as watching your Zerto disaster-recovery replication, the portal can let you operate it: pause and resume a VPG, force a re-sync, run a safe failover test, and, when you need it, carry out a real failover with a guarded, step-by-step confirmation. These are advanced, optional controls that Assurestor switches on per service and per person, so you may not see all of them. This guide explains what each one does and how the safety checks work.
Where to find it. In the left menu open Services → Zerto → VPGs (web address /app/main/services/zerto/vpgs). Each VPG row has an action menu, opened from the small cog button at the end of the row. The same actions also appear inside the VPG Details pop-up. An item only shows if that capability is enabled for your service and you have permission to use it.
Two very different kinds of action. A failover test is completely safe: it spins up a temporary copy at the recovery site and never touches your live machines. A live failover is a real disaster-recovery action that shuts your protected machines down and brings them up at the recovery site. The portal treats the two quite differently, and so should you.
The action (cog) menu
Every VPG row on the VPGs list ends with a cog button. Clicking it opens a short menu of the operations available for that group. Because the items are gated per service and per permission, the menu you see may be shorter than the one below, and some entries may be greyed out when they do not currently apply.
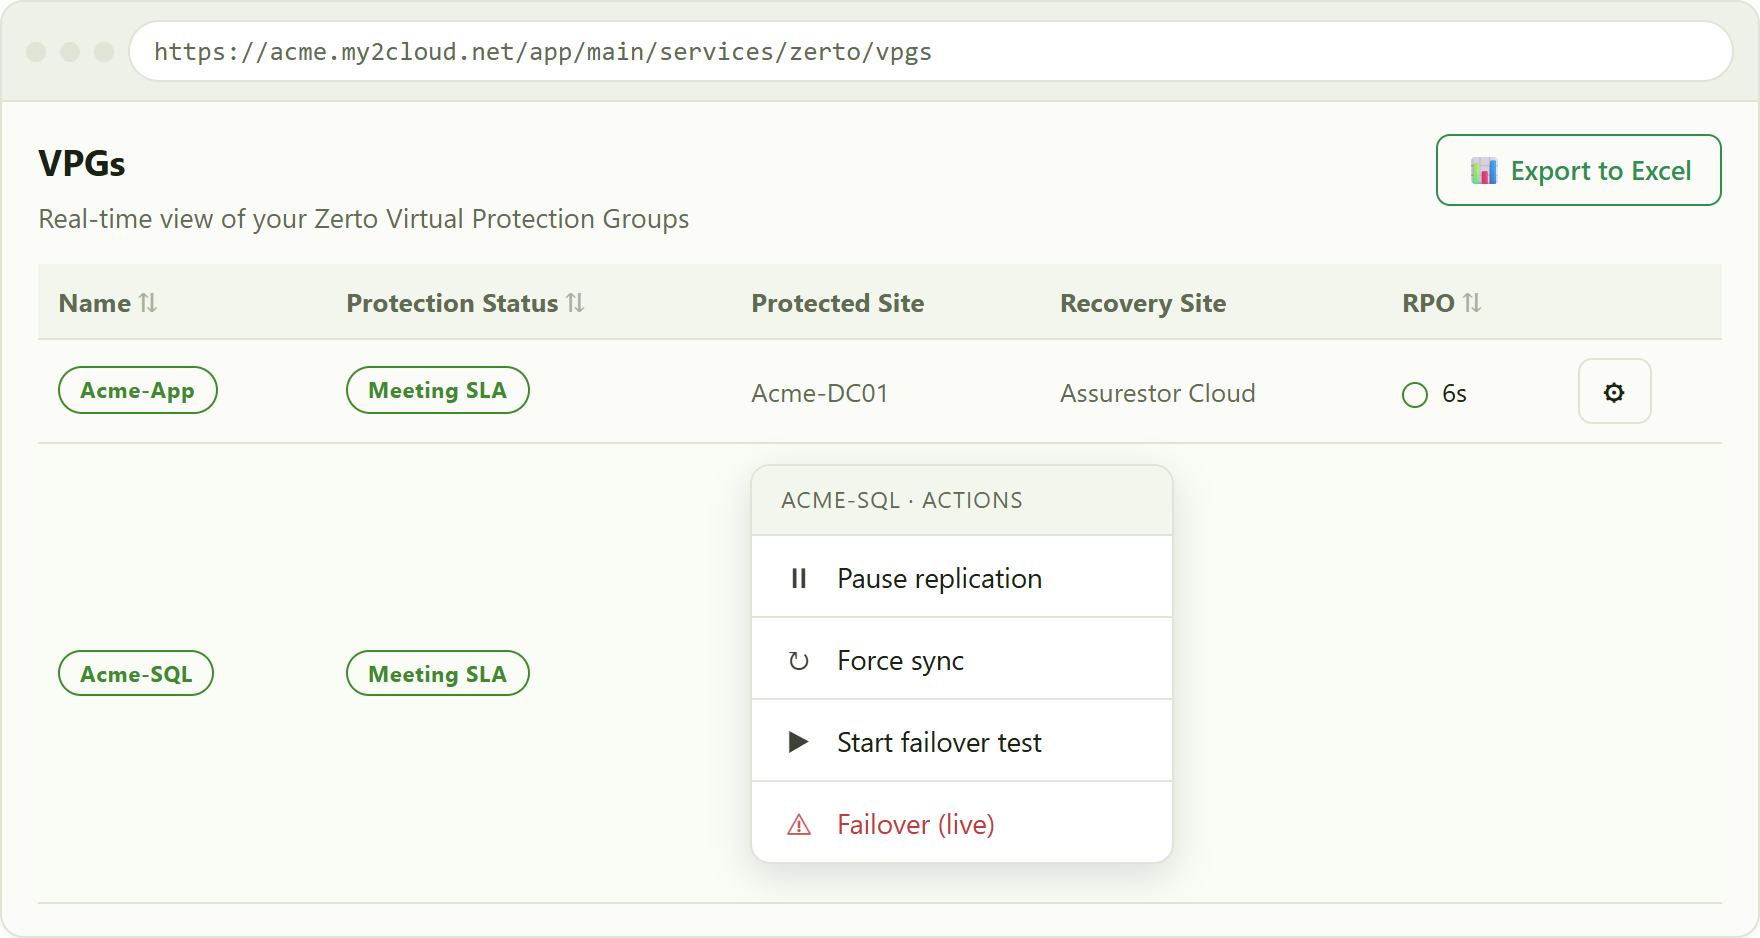
the cog menu open on a VPG row. Non-destructive controls sit at the top; the live failover is set apart in red. Items you do not have, or that do not currently apply, are hidden or greyed out.
Pause, resume and force sync
These are the everyday, non-destructive controls. None of them affects your live machines; they only change how replication is running.
- Pause replication - temporarily stops replicating the group. Useful during planned maintenance at the protected site. The menu item reads Pause replication when the VPG is running.
- Resume replication - the same item flips to Resume replication once a group is paused, so a single control toggles between the two depending on the current state.
- Force sync - asks Zerto to re-synchronise the VPG, which is the usual way to clear a group that has drifted out of step.
Each of these asks for a simple confirmation and then runs. You can follow progress on the Tasks tab of the VPG Details pop-up.
When these are unavailable. Pause, resume and force sync are greyed out while any recovery operation is under way, that is while a live failover is in progress in any phase, or while a failover test is running. Once the recovery operation has finished, they become available again.
Failover test (start and stop)
A failover test starts a temporary copy of the protected machines at the recovery site to prove they boot cleanly, without touching your live environment. It is the safe way to gain confidence that a real failover would work. Your live machines carry on running and replicating throughout.
- Start failover test begins the test. It is disabled while a test is already running for the group, and while a live failover is in progress.
- Stop failover test is available only while a test is running. It cleans up the temporary machines and returns the group to normal.
Starting or stopping a test is a failover operation, so the portal asks you to confirm with your two-factor code first (see The security step below). You can review the outcome of past tests on the Failover tests tab of the VPG Details pop-up.
Live failover (a real DR action)
A live failover brings your protected machines up at the recovery site for real. Because it shuts the protected machines down and reverses the direction of protection, the portal guides you through a guarded, three-step confirmation before anything happens. You can back out at any step until the final confirmation.
- Reverse-protection warning. The first step explains that failing over will reverse the direction of protection, so that the recovery site becomes the live side. Read it and continue only if that is what you intend.
- Choose the recovery point. You then pick the point in time to recover to: the latest point, a tagged checkpoint, a VSS checkpoint, or a specific point in time chosen from a list. The latest point loses the least data; an earlier point lets you step back to before a problem occurred.
- Final confirmation. The last step warns clearly that the protected VMs will be shut down, and asks you to re-confirm your identity with your two-factor code (or password) before it will start.
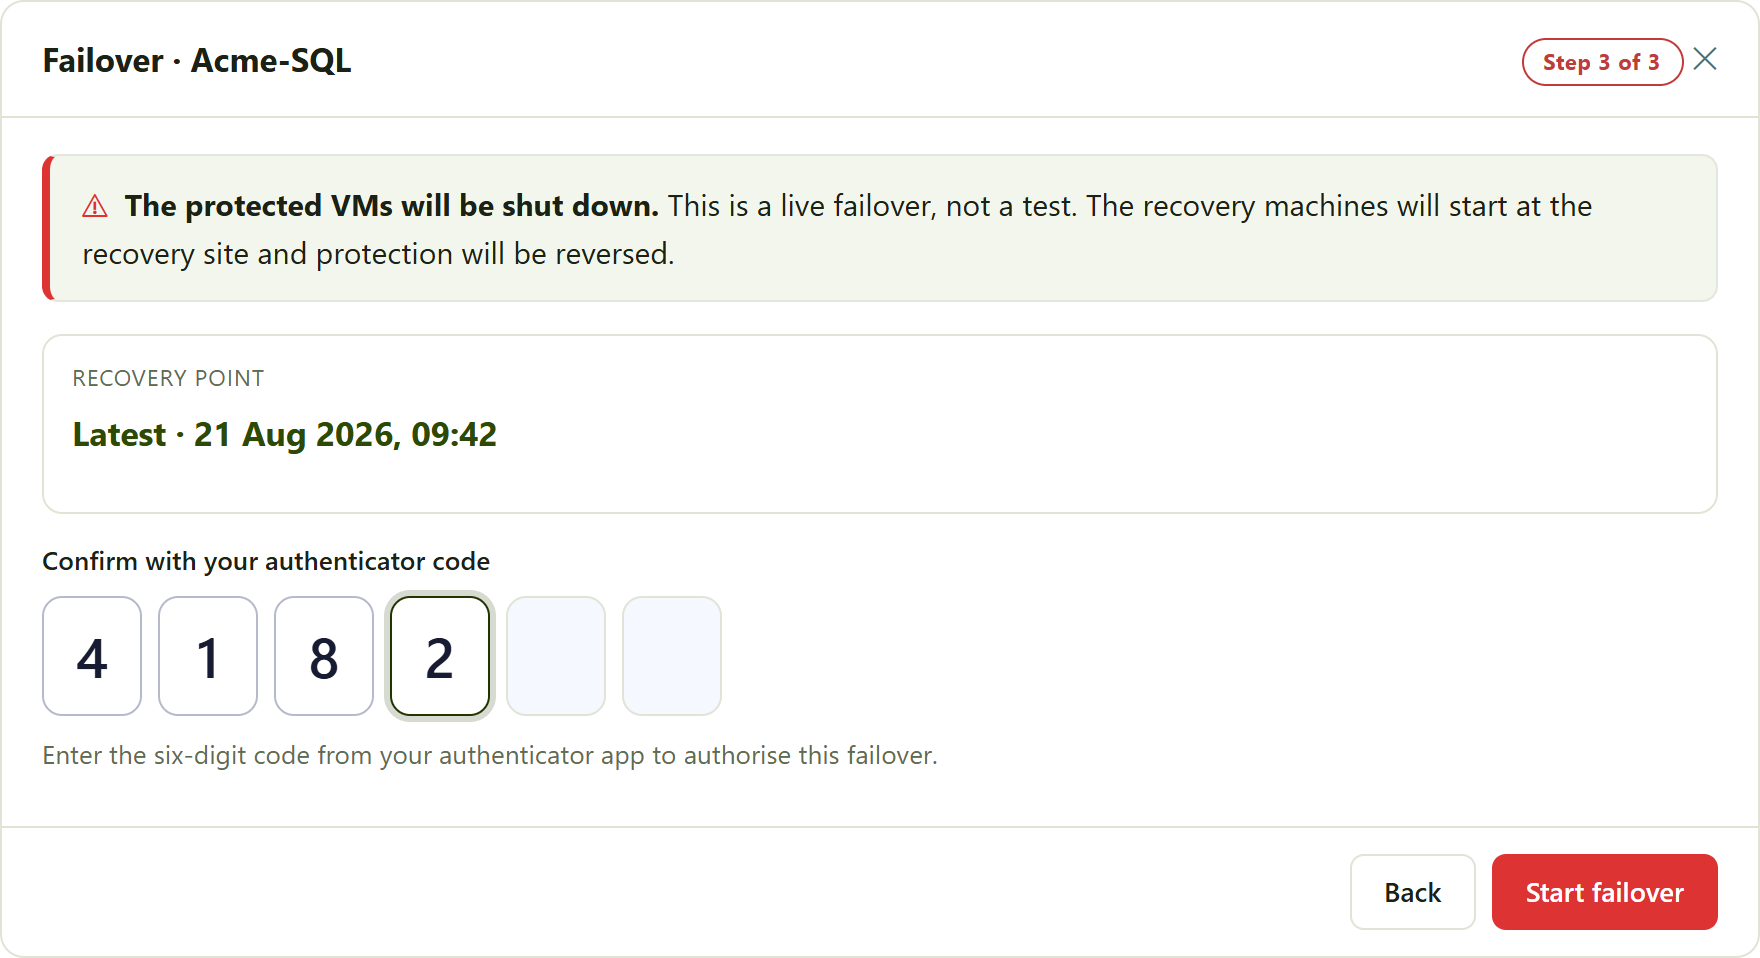
the final step of the live-failover confirmation. The recovery point chosen at step 2 is shown for review, and the six-box code entry authorises the action before it runs.
The hold at "before commit"
The portal deliberately starts a live failover so that it holds at a decision point and never finishes on its own. While it is promoting the machines the VPG shows Failing over before commit and waits for you. During this hold the recovered machines are up so you can log in and check they are working as expected before you make anything permanent.
Once promotion has finished and progress reaches 100%, two further actions appear in the cog menu. You decide which to take:
- Commit - accept the failover and make it permanent. Protection stays reversed, with the recovery site now the live side.
- Roll back - undo the failover and return the group to normal protection, as though the failover had not happened.
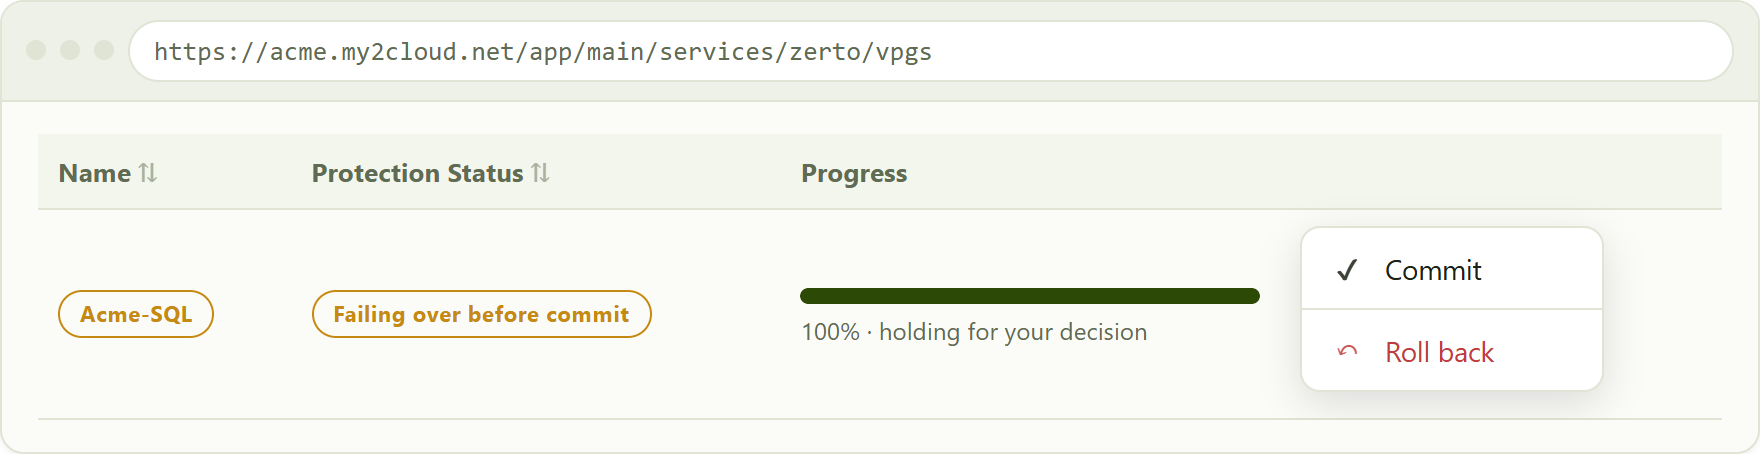
a VPG holding at "Failing over before commit". Once progress reaches 100%, Commit and Roll back are offered so you can validate the recovered machines before choosing.
Nothing is permanent until you say so. The failover pauses at the before-commit point on purpose. Take the time you need to confirm the recovered machines are healthy, then choose Commit to keep the failover or Roll back to return to normal protection.
The security step
The failover operations all ask you to re-confirm who you are before they run. That covers starting and stopping a failover test, starting a live failover, and both Commit and Roll back. You confirm with your two-factor code (or your password) entered into a six-box code field in the modal, exactly like the one shown above. This step-up check is there so that a real DR action can never be triggered by a stray click.
Why an item might be greyed out
The menu changes with the state of the group, so an item you expect may be unavailable for a good reason:
- Commit and Roll back appear only once a live failover is holding at the completed before-commit point (progress at 100%). Before then they are not shown.
- Pause, Resume and Force sync are disabled while any recovery operation is under way, that is a live failover in any phase, or a running failover test.
- Start failover test and Failover (live) are disabled while a failover or a test is already running for the group. You cannot start a second failover, or a test, on top of one that is already in progress.
Who did what, and on whose VPGs
Every action you take here is recorded and shown in the VPG's task history as initiated by you, via My2Cloud, so there is always a clear record of who started an operation and when. You can review it on the Tasks tab of the VPG Details pop-up.
You can only ever act on your own organisation's (ZORG's) VPGs. The portal scopes these controls to your own groups, so there is no way to affect anyone else's protection.
If you do not see any of these actions. The cog menu only appears where command and control is switched on for your service. If your VPG rows have no action menu, the capability is not enabled for you. Speak to Assurestor if you would like to discuss switching it on.
Tips
- Run a failover test whenever you want reassurance that a real failover would work. It is safe, does not touch your live machines, and its result is kept on the Failover tests tab.
- For a real failover, choose the latest recovery point to lose the least data, or an earlier point in time if you need to step back to before a problem started.
- Use the hold at before commit to log in and check the recovered machines properly. Only Commit once you are satisfied; otherwise Roll back returns you to normal protection.
- Keep your authenticator app to hand: the failover operations will each ask for a fresh six-digit code before they run.
- Watch the Tasks tab to follow any operation you start and to see it recorded against your name.
Was this article helpful?
That’s Great!
Thank you for your feedback
Sorry! We couldn't be helpful
Thank you for your feedback
Feedback sent
We appreciate your effort and will try to fix the article